


Table of contents
- First, Identify Where the NVMe SSD Is Missing
- 1. Turn Off the PC and Reseat the NVMe Drive
- 2. Check Whether the M.2 Slot Supports NVMe
- 3. Try Another M.2 Slot if Your Motherboard Has One
- 4. Update the BIOS or UEFI Firmware
- 5. Review BIOS Storage Settings
- 6. If Windows Installer Does Not See the NVMe SSD
- 7. If the NVMe Appears in BIOS but Not in Windows
- 8. Check for PCIe Lane Sharing and Disabled Ports
- 9. Check the SSD in Another System or Enclosure
- 10. Watch for Signs of a Faulty NVMe SSD
- Quick Troubleshooting Checklist
- Final Thoughts
- FAQ
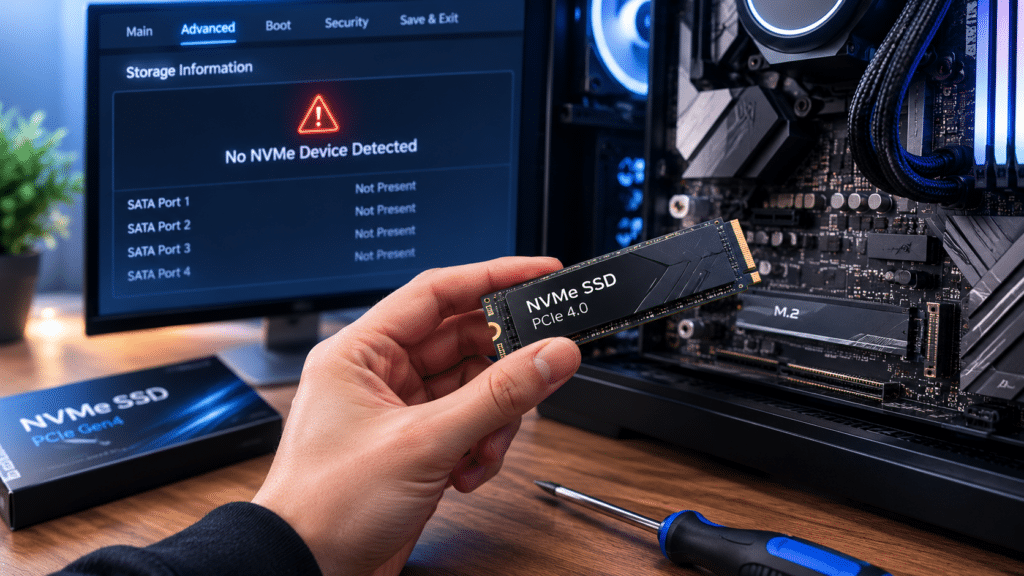
Few PC-building problems feel worse than installing a new NVMe SSD, powering on the system, and seeing nothing. No drive in BIOS. No storage option in the Windows installer. And no sign of the SSD inside Windows.
The good news is that an NVMe drive not appearing does not always mean the SSD is dead. In many cases, the cause is much simpler: the drive is not seated correctly, the wrong M.2 slot is being used, a BIOS setting is hiding the drive, or Windows needs the correct storage driver during installation.
This guide walks through the checks in the right order, starting with the easiest physical fixes before moving into BIOS settings, Windows setup, motherboard compatibility, and possible hardware failure.
First, Identify Where the NVMe SSD Is Missing
Before changing anything, confirm where the drive is not detected. This helps you avoid wasting time on the wrong fix.
Your NVMe SSD may be missing from:
- BIOS or UEFI
- Windows 11 File Explorer
- Disk Management
- Device Manager
- The Windows installation screen
- A motherboard storage list or boot menu
These situations do not all mean the same thing. A new SSD may appear in BIOS and Disk Management but not in File Explorer because it has not been initialized or formatted yet. But if the NVMe not detected in BIOS at all, the issue is more likely related to installation, slot compatibility, motherboard configuration, firmware, or the drive itself.
1. Turn Off the PC and Reseat the NVMe Drive
Start with the physical installation. It sounds basic, but an M.2 SSD can look installed while not being fully seated in the slot.
Shut down the PC, switch off the power supply, unplug the power cable, and press the power button once to discharge remaining power. Then remove the NVMe drive and reinstall it carefully.
Check that:
- The SSD is inserted fully into the M.2 slot at a slight angle.
- The gold connector is not partly visible after installation.
- The drive is secured with the correct standoff and screw.
- The SSD is not bent too tightly under a heatsink.
- Any protective film on the motherboard heatsink thermal pad has been removed.
- No dust, packaging material, or misplaced standoff is blocking contact.
If your motherboard uses a tool-less latch instead of a screw, make sure the latch is actually locking the drive in place. A loose NVMe SSD can disappear from BIOS or only appear intermittently.
2. Check Whether the M.2 Slot Supports NVMe
Not every M.2 slot supports every M.2 SSD. M.2 describes the physical connector and size, but the drive itself can use different interfaces.
Most modern NVMe SSDs use PCIe. Some older M.2 SSDs use SATA. Some motherboard M.2 slots support both, while others support only PCIe/NVMe or only SATA.
If your NVMe SSD is not detected in BIOS, check your motherboard manual and confirm:
- The M.2 slot supports PCIe/NVMe drives.
- The slot supports your SSD length, such as 2280.
- The slot is available with your CPU and motherboard configuration.
- The slot is not disabled when certain SATA ports or PCIe slots are used.
This is especially important on older motherboards or budget boards with multiple M.2 connectors. One slot may support NVMe, while another may only support SATA M.2 drives.
3. Try Another M.2 Slot if Your Motherboard Has One
If your motherboard has more than one M.2 slot, move the NVMe SSD to another compatible slot.
This can quickly reveal whether the issue is caused by:
- A disabled M.2 slot
- PCIe lane sharing
- A slot-specific compatibility limitation
- A damaged M.2 connector
- A motherboard BIOS configuration issue
Some motherboards disable certain SATA ports when an M.2 slot is populated. Others reduce PCIe lane availability depending on the GPU slot, chipset lanes, or CPU generation. The exact behavior depends on the board, so the motherboard manual is the best source.
If the SSD appears in another slot, the drive is probably fine. The problem is likely slot configuration or motherboard compatibility.
4. Update the BIOS or UEFI Firmware
A BIOS update can improve storage compatibility, especially with newer NVMe drives, newer CPUs, or motherboards that launched before certain SSD models became common.
Before updating, check your motherboard manufacturer’s support page and read the BIOS notes carefully. Follow the official update method for your board. Do not interrupt the update once it starts.
A BIOS update may help if:
- The motherboard sees other drives but not the NVMe SSD.
- The drive is newer than the motherboard.
- The motherboard has known storage compatibility updates.
- The system behaves inconsistently after installing the SSD.
After updating, enter BIOS again and check the storage or NVMe information section. Intel also provides a detailed that can help explain how NVMe boot support works on compatible systems.
5. Review BIOS Storage Settings
If the hardware is installed correctly but the NVMe still does not appear, check BIOS settings.
The names vary by motherboard brand, but look for options related to:
- NVMe configuration
- PCIe storage
- M.2 slot configuration
- SATA mode
- RAID mode
- Intel RST
- Intel VMD
- CSM
- UEFI boot mode
For most single-drive Windows 11 systems, UEFI mode is usually the expected configuration. If Compatibility Support Module, or CSM, is enabled, it may affect how boot devices appear, especially during OS installation.
Also check whether the system is set to RAID, Intel RST, or VMD mode. On some Intel systems, the Windows installer may not show the NVMe drive until the correct Intel Rapid Storage Technology driver is loaded. ASUS documents this issue in its support guide for cases where Windows setup cannot find drives during installation, especially on newer Intel platforms using RST or VMD.
If you are not using RAID, switching to a standard AHCI or non-VMD storage mode may make the drive easier for Windows to detect. Be careful if Windows is already installed on another drive, though. Changing storage modes can stop an existing Windows installation from booting.
6. If Windows Installer Does Not See the NVMe SSD
Sometimes BIOS detects the NVMe SSD, but the Windows 11 installer does not show it as an installation target.
This usually points to a storage controller driver issue rather than a dead SSD.
Try these steps:
- Confirm the drive appears in BIOS.
- Recreate the Windows installation USB using Microsoft’s official Windows 11 download page.
- Use a different USB port if the installer behaves strangely.
- If the system uses Intel RST or VMD, download the correct storage driver from the motherboard, laptop, or system manufacturer.
- On the Windows installation screen, choose Load driver and point it to the extracted driver files on a USB drive.
- If you do not need RAID or VMD, check BIOS for an option to disable VMD or switch storage mode, but only if it is safe for your current setup.
This issue is not the same as File Explorer failing to show a new SSD. If the Windows installer cannot see the drive, focus on BIOS visibility, storage mode, and installation drivers first.
7. If the NVMe Appears in BIOS but Not in Windows
If the SSD is visible in BIOS but missing from File Explorer, open Disk Management in Windows.
A brand-new SSD often needs to be initialized, partitioned, formatted, and assigned a drive letter before it appears in File Explorer. Microsoft explains the process in its guide on how to initialize new disks in Windows Disk Management.
To check:
- Right-click the Start button.
- Select Disk Management.
- Look for a disk marked Unknown, Not Initialized, or Unallocated.
- Initialize the disk if prompted.
- Create a new simple volume.
- Format it using NTFS or exFAT, depending on your use case.
- Assign a drive letter.
Use GPT for modern Windows 11 systems unless you have a specific reason to use MBR.
If the SSD appears in Device Manager but not in Disk Management, check storage controller drivers, chipset drivers, and whether the drive appears correctly in BIOS.
8. Check for PCIe Lane Sharing and Disabled Ports
Motherboards have limited PCIe lanes. Depending on the CPU and chipset, some M.2 slots share bandwidth with SATA ports or PCIe expansion slots.
This can cause confusing behavior. For example:
- Installing an NVMe SSD may disable one or more SATA ports.
- Using a second M.2 slot may reduce PCIe lanes available to another slot.
- A certain M.2 slot may only work with specific CPU generations.
- Some slots may be unavailable when another expansion card is installed.
Do not guess here. Open the motherboard manual and check the storage section. Look for tables showing M.2 slot support, SATA port sharing, PCIe lane behavior, and CPU limitations.
If needed, disconnect extra SATA drives and expansion cards temporarily, then boot again with only the NVMe SSD installed.
9. Check the SSD in Another System or Enclosure
If the NVMe SSD is still not detected in BIOS after reseating, changing slots, and checking settings, test the drive somewhere else.
You can use:
- Another desktop with a compatible M.2 slot
- A compatible NVMe USB enclosure
- A PCIe-to-M.2 adapter card
Make sure the enclosure supports NVMe, not only SATA M.2. Many M.2 USB enclosures support one type but not the other.
If the drive appears in another system, your motherboard slot, BIOS configuration, or platform compatibility is likely the issue. If the drive does not appear anywhere, the SSD may be faulty.
10. Watch for Signs of a Faulty NVMe SSD
A dead or failing NVMe drive is less common than a configuration issue, but it can happen.
Possible signs include:
- The SSD is not detected in any compatible system.
- The drive appears and disappears randomly.
- BIOS freezes or takes unusually long to detect storage.
- Windows installation fails repeatedly on the same drive.
- The SSD appears with incorrect capacity.
- The drive becomes extremely hot immediately with no workload.
If the SSD is new, check the return or warranty options before spending too much time on advanced fixes. If the drive contains important data, avoid repeated formatting or initialization attempts and consider professional recovery options.
Quick Troubleshooting Checklist
If you want the shortest path, follow this order:
- Power off the PC and reseat the NVMe SSD.
- Confirm the M.2 slot supports NVMe, not only SATA.
- Try another M.2 slot if available.
- Check the motherboard manual for disabled ports or lane sharing.
- Enter BIOS and look for NVMe or storage configuration.
- Update BIOS if the board may have compatibility issues.
- If Windows installer cannot see the drive, check Intel RST or VMD driver requirements.
- If Windows sees the drive but File Explorer does not, initialize and format it in Disk Management.
- Test the SSD in another PC or NVMe enclosure.
- Consider the drive faulty only after compatibility and configuration checks fail.
Final Thoughts
An NVMe SSD not detected in BIOS can feel like a serious hardware failure, but the fix is often simple. Start with the physical installation, then confirm that the M.2 slot supports NVMe and is not disabled by motherboard lane sharing. After that, move into BIOS settings, firmware updates, and Windows driver checks.
The key is to separate three different problems: a drive not detected by BIOS, a drive not shown by the Windows installer, and a drive visible to Windows but not shown in File Explorer. Each one points to a different fix.
If the SSD does not appear in any compatible system after all checks, then it may be time to return or replace the drive.
FAQ
Why is my NVMe SSD not detected in BIOS?
The most common causes are improper installation, an incompatible M.2 slot, PCIe lane sharing, disabled motherboard slots, outdated BIOS firmware, or a faulty SSD. Start by reseating the drive and checking your motherboard manual.
Why does my NVMe show in BIOS but not in Windows 11?
If the drive appears in BIOS but not in File Explorer, it may need to be initialized, formatted, and assigned a drive letter in Disk Management. If it does not appear in Disk Management, check chipset and storage controller drivers.
Why does Windows Setup not detect my NVMe SSD?
Windows Setup may need a storage controller driver, especially on some Intel systems using RST or VMD. Download the correct driver from your motherboard, laptop, or system manufacturer and use the Load driver option during installation.
Can an M.2 slot support SATA but not NVMe?
Yes. M.2 is a physical form factor, not a guarantee of NVMe support. Some M.2 slots support SATA only, some support PCIe/NVMe only, and some support both. Always check the motherboard manual.
Should I disable CSM for an NVMe SSD?
For most Windows 11 installations, UEFI mode is preferred. Disabling CSM can help some systems show NVMe boot options correctly. However, changing boot settings on an existing Windows installation can cause boot issues, so check your setup first.
How do I know if my NVMe SSD is dead?
Test it in another compatible PC or a known-good NVMe enclosure. If it is not detected anywhere, appears with the wrong capacity, or causes repeated system freezes, the SSD may be faulty.
Read More →Is a 2TB SSD Worth It in 2026?